Jump to content
  • Resources

    Extreme Tech Support resources, tutorials, guides and articles database.
    • AWS

      Howto: Install Centmin Mod

      By AWS, in Resources,

      Centmin Mod is a popular LEMP stack installer for CentOS, designed to set up a high-performance web server. Here’s how to install Centmin Mod on a CentOS server:
      Prerequisites
      Server: A fresh installation of CentOS 7 or 8 (recommended). SSH Access: Access to your server via SSH. Root Privileges: You should have root access or a user with sudo privileges. Step 1: Update Your System
      First, log into your server and update the system packages:
        sudo yum update -y Step 2: Install Required Packages
      Install the necessary packages:
       sudo yum install -y git wget gcc make Step 3: Install Centmin Mod
      Clone the Centmin Mod Repository:   git clone https://github.com/centminmod/centminmod.git /usr/local/src/centminmod Navigate to the Directory: cd /usr/local/src/centminmod Run the Installer: sudo bash centmin.sh Step 4: Configure Centmin Mod
      After running the installer, you will be prompted with a menu. Here are some common options:
      Choose the default settings for your installation. You can modify them according to your needs. Follow the prompts to set up your server. This includes selecting PHP versions, configuring MySQL, and other settings. Step 5: Complete Installation
      Once the installation is complete, you can check the status of the installed services: 
      sudo service nginx status sudo service php-fpm status sudo service mysql status Step 6: Access Your Server
      You can now access your server via a web browser by entering your server's IP address. The default Nginx welcome page should appear if everything is set up correctly.
      Step 7: Post-Installation Configuration
      Secure MySQL: Run the following command to secure your MySQL installation: sudo mysql_secure_installation Firewall Configuration: If you have a firewall enabled, make sure to allow HTTP and HTTPS traffic: sudo firewall-cmd --permanent --add-service=http sudo firewall-cmd --permanent --add-service=https sudo firewall-cmd --reload Step 8: Additional Configuration
      You may want to configure additional settings, such as SSL certificates, PHP settings, and more, depending on your needs.
      Conclusion
      You have now installed Centmin Mod on your CentOS server. For further configurations and optimizations, refer to the Centmin Mod Documentation for detailed guidelines and best practices.
       
      View full article
       

    • AWS

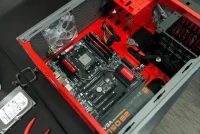
      Steps to Build a Computer

      By AWS, in Resources,

      Here’s a step-by-step guide on how to do it:
      Components Needed
      Central Processing Unit (CPU): The brain of the computer. Motherboard: The main circuit board that connects all components. RAM (Memory): Temporary storage for data the CPU uses. Storage: SSD or HDD for data storage. Power Supply Unit (PSU): Provides power to the components. Graphics Card (GPU) (if not using integrated graphics): Handles rendering images and video. Computer Case: Enclosure for all components. Cooling System: Fans or liquid cooling to keep components cool. Cables: For connecting components. Tools Needed
      Screwdriver (usually Phillips) Anti-static wrist strap (optional but recommended) Thermal paste (if not pre-applied on the cooler) Steps to Build a Computer
      Prepare Your Workspace:
      Find a clean, static-free surface to work on. Install the CPU:
      Open the CPU socket on the motherboard. Align the CPU with the socket and gently place it in. Lock it in place. Install RAM:
      Open the RAM slots on the motherboard. Align the RAM sticks with the slots and press down until they click into place. Install the Motherboard:
      Place the motherboard in the case, aligning it with the standoffs. Secure it with screws. Install the Power Supply:
      Place the PSU in the designated area of the case. Secure it with screws. Install Storage:
      Mount the SSD or HDD in the appropriate drive bays. Connect it to the motherboard with SATA cables. Install the Graphics Card (if applicable):
      Insert the GPU into the appropriate PCIe slot on the motherboard. Secure it with screws. Connect Cables:
      Connect the PSU cables to the motherboard, CPU, GPU, and storage. Ensure all cables are properly connected and organized. Install Cooling:
      If using an aftermarket cooler, apply thermal paste to the CPU. Attach the cooler according to the manufacturer’s instructions. Final Checks:
      Ensure all components are securely installed and all cables are connected. Power On:
      Connect the monitor, keyboard, and mouse. Turn on the power supply and press the power button on the case. Install Operating System:
      Follow the prompts to install your preferred OS (Windows, Linux, etc.). Tips
      Refer to the manuals for specific components for detailed instructions. Take your time and don’t rush the process. Keep track of screws and parts to avoid losing them. Enjoy your new custom-built computer! If you have specific questions or need further assistance post a comment.

    • AWS
      To install MySQL and PHP on Windows, you can follow these steps:
      Step 1: Install MySQL
      Download MySQL Installer:
      Go to the MySQL Community Downloads page. Download the MySQL Installer for Windows. Run the Installer:
      Launch the downloaded installer. Choose the "Developer Default" setup type to install MySQL Server and other tools. Follow the Installation Steps:
      Accept the license agreement. Choose the MySQL Server version you want to install. Configure the server (set the root password and other options). Complete the installation. Verify MySQL Installation:
      Open Command Prompt and type mysql -u root -p to log in to MySQL. Enter the root password you set during installation. Step 2: Install PHP
      Download PHP:
      Go to the PHP for Windows page. Download the latest Non-Thread Safe (NTS) version of PHP (the zip file). Extract PHP:
      Extract the downloaded zip file to a directory (e.g., C:\php). Configure PHP:
      Rename php.ini-development to php.ini. Open php.ini in a text editor and configure the necessary settings (like enabling extensions). Add PHP to the System Path:
      Right-click on "This PC" or "My Computer" and select "Properties." Click on "Advanced system settings" and then "Environment Variables." Find the "Path" variable in the "System variables" section and click "Edit." Add the path to your PHP directory (e.g., C:\php). Verify PHP Installation:
      Open Command Prompt and type php -v to check if PHP is installed correctly. Step 3: (Optional) Install a Web Server
      For PHP to run, you may want to install a web server like Apache or Nginx. Alternatively, you can use XAMPP or WAMP, which bundle Apache, MySQL, and PHP together for easier installation.
      Step 4: Test PHP with MySQL
      Create a simple PHP file (e.g., test.php) in your web server's root directory with the following content:
      <?php $conn = new mysqli('localhost', 'root', 'your_password', 'your_database'); if ($conn->connect_error) { die("Connection failed: " . $conn->connect_error); } echo "Connected successfully"; ?> Access this file through your web browser to see if it connects to MySQL successfully.
      Conclusion
      Following these steps will help you set up MySQL and PHP on your Windows machine. If you encounter any issues, make sure to check the official documentation for MySQL and PHP for troubleshooting tips.

    • AWS

      Setup Ubuntu as a Webserver

      By AWS, in Resources,

      Setting up a LAMP stack (Linux, Apache, MySQL, PHP) with SMTP on Ubuntu involves several steps. Here’s a detailed guide to help you through the process:
      Step 1: Update Your System
      First, ensure your system is up to date:
      sudo apt update sudo apt upgrade Step 2: Install Apache
      Install the Apache web server:
      sudo apt install apache2 Start and enable Apache to run on boot:
          sudo systemctl start apache2 sudo systemctl enable apache2
      Step 3: Install MySQL
      Install MySQL server:
      sudo apt install mysql-server Secure the MySQL installation:
          sudo mysql_secure_installation
      Follow the prompts to set a root password and secure your installation.
      Step 4: Install PHP
      Install PHP along with necessary extensions:
      sudo apt install php libapache2-mod-php php-mysql To install additional PHP extensions (like for SMTP):
      sudo apt install php-xml php-mbstring php-curl Step 5: Configure Apache to Use PHP
      By default, Apache should already be configured to use PHP. You can test it by creating a PHP info file:
      echo "<?php phpinfo(); ?>" | sudo tee /var/www/html/info.php Access it in your web browser at http://your_server_ip/info.php to verify PHP is working.
      Step 6: Install and Configure an SMTP Server
      For sending emails, you can use Postfix as your SMTP server. Install it:
        sudo apt install postfix
      During installation, you'll be prompted to choose a configuration type. Select "Internet Site" and set your server's domain name.
      Configure Postfix
      Edit the Postfix configuration file:
        sudo nano /etc/postfix/main.cf
      Make sure to set the following parameters:
      myhostname = your_domain_or_IP mydestination = $myhostname, localhost.$mydomain, localhost relayhost = Save and exit the file. Then restart Postfix:
         sudo systemctl restart postfix
      Step 7: Test Email Sending
      You can use the mail command to test sending an email:
      echo "Test email body" | mail -s "Test Subject" recipient@example.com Make sure you have the mailutils package installed:
      sudo apt install mailutils Step 8: Install Composer (Optional)
      If you plan to use PHP frameworks (like Laravel), you might want to install Composer:
      sudo apt install composer Step 9: Secure Your Server
      Firewall Configuration: Allow HTTP, HTTPS, and SSH:
      sudo ufw allow 'Apache Full' sudo ufw allow OpenSSH sudo ufw enable SSL Configuration: Consider setting up SSL using Let's Encrypt:
      sudo apt install certbot python3-certbot-apache sudo certbot --apache Step 10: Final Testing
      Create a simple PHP script to test database connectivity and email sending: <?php $servername = "localhost"; $username = "root"; // or your MySQL username $password = "your_password"; // your MySQL password $dbname = "test_db"; // your database name // Create connection $conn = new mysqli($servername, $username, $password, $dbname); // Check connection if ($conn->connect_error) { die("Connection failed: " . $conn->connect_error); } echo "Connected successfully"; // Test sending an email mail("recipient@example.com", "Test Subject", "Test email body"); ?> Place this script in your web server directory (e.g., /var/www/html/test.php) and access it in your browser.
      Conclusion
      You now have a basic LAMP stack with SMTP configured on your Ubuntu server. Adjust configurations as necessary based on your requirements, and ensure to maintain security best practices.
       

    • AWS
      To install an operating system from a USB thumb drive, follow these general steps. The process may vary slightly depending on the operating system you are installing (e.g., Windows, Linux). Here’s a general guide:
      Step 1: Prepare the USB Drive
      Backup Data: Ensure that any important data on the USB drive is backed up, as this process will erase all data on it.
      Download the OS ISO:
      For Windows, download the Media Creation Tool from the Microsoft website or the ISO directly. For Linux, download the ISO from the distribution's official website (e.g., Ubuntu, Fedora). Create a Bootable USB Drive:
      Windows: Use tools like Rufus or Windows USB/DVD Download Tool. Open Rufus, select your USB drive, choose the ISO file, and click "Start." Linux: Use Startup Disk Creator (Ubuntu) or dd command in the terminal. For example, using dd: sudo dd if=/path/to/your.iso of=/dev/sdX bs=4M Replace /dev/sdX with your USB drive identifier. Step 2: Boot from the USB Drive
      Insert the USB Drive: Plug the USB drive into the computer where you want to install the OS.
      Access BIOS/UEFI:
      Restart the computer and enter the BIOS/UEFI setup. This is usually done by pressing a key like F2, F10, DEL, or ESC right after powering on (the specific key depends on your computer's manufacturer). Change Boot Order:
      In the BIOS/UEFI settings, find the boot order settings. Set the USB drive as the first boot device. Save and Exit: Save your changes and exit the BIOS/UEFI setup.
      Step 3: Install the Operating System
      Boot from USB: The computer should now boot from the USB drive.
      Follow Installation Instructions:
      For Windows, select your language, time, and keyboard preferences, then click "Next" and "Install now." For Linux, follow the prompts to install the OS, including partitioning the disk if necessary. Complete the Installation: Follow the on-screen instructions to complete the installation. This may include setting up user accounts, configuring settings, etc.
      Remove the USB Drive: Once the installation is complete and the system restarts, you can remove the USB drive.
      Step 4: Finalize Setup
      After the OS is installed, you may need to install drivers and perform updates. Following these steps should help you successfully install an operating system from a USB thumb drive. If you have a specific OS in mind, let me know, and I can provide more tailored instructions.

    • AWS
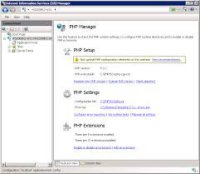
      To install PHP Manager on Windows, follow these steps:
      Install IIS (Internet Information Services):
      Open the Control Panel. Go to "Programs" > "Turn Windows features on or off." Check the box for "Internet Information Services" and click OK. Download PHP:
      Go to the PHP for Windows website. Download the latest Non-Thread Safe version of PHP (usually a zip file). Extract PHP:
      Extract the downloaded PHP zip file to a folder, e.g., C:\php. Configure PHP:
      Rename php.ini-development to php.ini. Open php.ini in a text editor and configure the necessary settings (like enabling extensions). Install PHP Manager:
      Download the PHP Manager for IIS from the official GitHub repository. Run the installer and follow the prompts to complete the installation. Configure PHP in IIS:
      Open IIS Manager. Select your server in the left pane. In the right pane, double-click on "Handler Mappings." Add a new module mapping for .php files that points to the php-cgi.exe file in your PHP installation directory. Test PHP:
      Create a phpinfo.php file in your web root (e.g., C:\inetpub\wwwroot\phpinfo.php) with the following content: <?php phpinfo(); ?> Open your web browser and navigate to http://localhost/phpinfo.php to see if PHP is working. After completing these steps, PHP should be successfully installed and configured on your IIS server.

    • AWS

      Welcome to Pages

      By AWS, in Resources,

      Welcome to Pages!
      Pages extends your site with custom content management designed especially for communities. Create brand new sections of your community using features like blocks, databases and articles, pulling in data from other areas of your community.
      Create custom pages in your community using our drag'n'drop, WYSIWYG editor. Build blocks that pull in all kinds of data from throughout your community to create dynamic pages, or use one of the ready-made widgets we include with the Invision Community.
       
      View our Pages documentation

×
×
  • Create New...