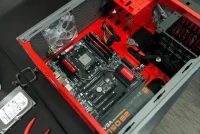
Here’s a step-by-step guide on how to do it:
Components Needed
- Central Processing Unit (CPU): The brain of the computer.
- Motherboard: The main circuit board that connects all components.
- RAM (Memory): Temporary storage for data the CPU uses.
- Storage: SSD or HDD for data storage.
- Power Supply Unit (PSU): Provides power to the components.
- Graphics Card (GPU) (if not using integrated graphics): Handles rendering images and video.
- Computer Case: Enclosure for all components.
- Cooling System: Fans or liquid cooling to keep components cool.
- Cables: For connecting components.
Tools Needed
- Screwdriver (usually Phillips)
- Anti-static wrist strap (optional but recommended)
- Thermal paste (if not pre-applied on the cooler)
Steps to Build a Computer
-
Prepare Your Workspace:
- Find a clean, static-free surface to work on.
-
Install the CPU:
- Open the CPU socket on the motherboard.
- Align the CPU with the socket and gently place it in. Lock it in place.
-
Install RAM:
- Open the RAM slots on the motherboard.
- Align the RAM sticks with the slots and press down until they click into place.
-
Install the Motherboard:
- Place the motherboard in the case, aligning it with the standoffs.
- Secure it with screws.
-
Install the Power Supply:
- Place the PSU in the designated area of the case.
- Secure it with screws.
-
Install Storage:
- Mount the SSD or HDD in the appropriate drive bays.
- Connect it to the motherboard with SATA cables.
-
Install the Graphics Card (if applicable):
- Insert the GPU into the appropriate PCIe slot on the motherboard.
- Secure it with screws.
-
Connect Cables:
- Connect the PSU cables to the motherboard, CPU, GPU, and storage.
- Ensure all cables are properly connected and organized.
-
Install Cooling:
- If using an aftermarket cooler, apply thermal paste to the CPU.
- Attach the cooler according to the manufacturer’s instructions.
-
Final Checks:
- Ensure all components are securely installed and all cables are connected.
-
Power On:
- Connect the monitor, keyboard, and mouse.
- Turn on the power supply and press the power button on the case.
-
Install Operating System:
- Follow the prompts to install your preferred OS (Windows, Linux, etc.).
Tips
- Refer to the manuals for specific components for detailed instructions.
- Take your time and don’t rush the process.
- Keep track of screws and parts to avoid losing them.
Enjoy your new custom-built computer! If you have specific questions or need further assistance post a comment.


