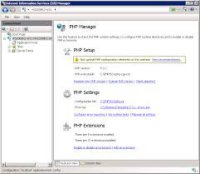
To install PHP Manager on Windows, follow these steps:
-
Install IIS (Internet Information Services):
- Open the Control Panel.
- Go to "Programs" > "Turn Windows features on or off."
- Check the box for "Internet Information Services" and click OK.
-
Download PHP:
- Go to the PHP for Windows website.
- Download the latest Non-Thread Safe version of PHP (usually a zip file).
-
Extract PHP:
-
Extract the downloaded PHP zip file to a folder, e.g.,
C:\php.
-
Extract the downloaded PHP zip file to a folder, e.g.,
-
Configure PHP:
-
Rename
php.ini-developmenttophp.ini. -
Open
php.iniin a text editor and configure the necessary settings (like enabling extensions).
-
Rename
-
Install PHP Manager:
- Download the PHP Manager for IIS from the official GitHub repository.
- Run the installer and follow the prompts to complete the installation.
-
Configure PHP in IIS:
- Open IIS Manager.
- Select your server in the left pane.
- In the right pane, double-click on "Handler Mappings."
-
Add a new module mapping for
.phpfiles that points to thephp-cgi.exefile in your PHP installation directory.
-
Test PHP:
-
Create a
phpinfo.phpfile in your web root (e.g.,C:\inetpub\wwwroot\phpinfo.php) with the following content:<?php phpinfo(); ?> -
Open your web browser and navigate to
http://localhost/phpinfo.phpto see if PHP is working.
-
Create a
After completing these steps, PHP should be successfully installed and configured on your IIS server.


Recommended Comments
There are no comments to display.
Join the conversation
You can post now and register later. If you have an account, sign in now to post with your account.